Ingredients for Chiffon Cupcakes: 3 egg yolks, 40g water (milk), 20g corn oil, 50g cake flour, 3 egg whites, 45g granulated sugar.
Method for Chiffon Cupcakes: Step 1: Prepare paper cups, a 3-egg recipe can make 8, with eggs weighing approximately 55g each. Avoid using small eggs as it will affect the ratio.
Step 16: When branding, I am always very cautious, especially with children at home, it is crucial to ensure they do not touch the hot surface. After use, it’s important to place it on a heat-resistant material. I accidentally placed it on a cutting board once, and it left a hole. The branding temperature should be around 280 degrees; too high will burn the cake surface instantly, and too low won’t imprint at all. If it’s exactly the desired 280 degrees, count 1, 2, 3 in your mind, and quickly remove it, which will prevent burning and maintain the appearance.
Step 17: Even when cooled, the cake will not wrinkle or collapse. It’s also sturdy for cupcake decoration, maintaining its shape without losing support.
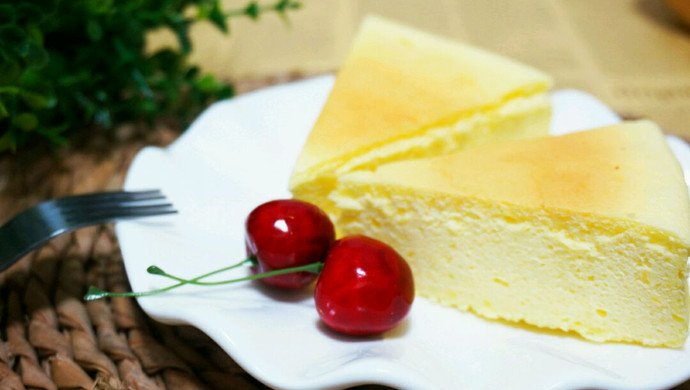
Step 18: The cake has a moist texture with a thin crust, which is very palatable, sweet, and not greasy.
Step 19: The structure is also perfect, with no shrinkage. For children allergic to milk, using water instead still yields a great taste.
Step 20: If using a convection oven for baking: bake at 110 degrees for 25 minutes, then at 120 degrees for 15 minutes before switching to 140 degrees for another 15 minutes. The egg whites should be in a chiffon state. To achieve perfection, focus on egg beating, and use the gradual temperature method, filling the cups to about 80% full, not too much. Convection oven cupcakes do not shrink, crack, or cave in (temperature transitions are crucial).
Phase one: before entering the oven, the batter should flow naturally flat; if it’s not flat, it will bake unevenly. Phase two: at 110 degrees for 25 minutes, the batter rises slowly, forming a dome shape instead of rising straight up. If it rises straight up, it indicates the oven temperature is too high or the batter is too full, leading to caving in after baking. Phase three: at 120 degrees for 15 minutes, the dome shape is basically set, and the temperature change makes the batter rise straight up. Phase four: at 140 degrees for 15 minutes, the baking sets the shape, and the advantage of a convection oven is the heat fan, ensuring the surface is dry and smooth, preventing shrinkage or caving in after baking.Step 21: To bake more using the convection oven, I’ve brought out an old mold from my home that was not in use, covered in rust. If using the 12-cup mold shown in my picture, one recipe is just right for one tray. I doubled the recipe, and if you have more molds, you can bake this cake in four layers at once in a convection oven.
Step 22: Start with a low temperature of 110 degrees for 25 minutes.
Step 23: Then increase to 120 degrees for 15 minutes.
Step 24: Finally, bake at 140 degrees for 15 minutes.
Step 25: Perfectly baked, give a gentle shake to release the steam.
Step 26: The convection oven does not age the cake.
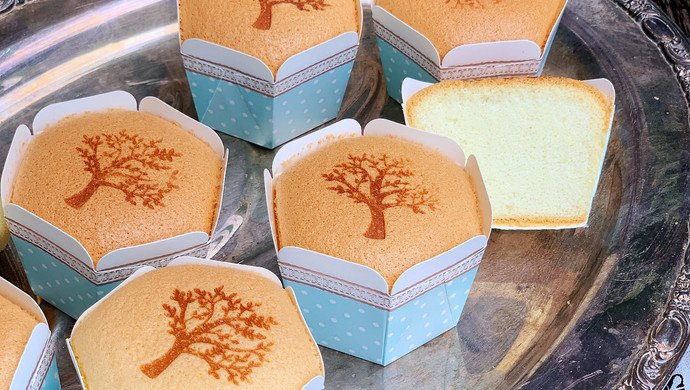
Step 27: 1, 2, 3, brand the logo.
Step 28: Even when cooled, it does not shrink.
Step 29: The appearance is still online, isn’t it?
Step 30 does not result in a dry and tough texture, nor a thick skin due to low-temperature, long baking. Instead, it yields a soft and moist result. This excellent baking technique is recommended for everyone to learn. I personally believe it is also suitable for steamed and baked cakes like the traditional cake and light cheesecake. Gradual temperature baking can definitely hold up.
Step 31, if you find it burnt like this, it’s not a baking issue but rather the searing head temperature is too high, causing it to char. So, pay attention to this. Baking Skills for Chiffon Cupcakes: Below is a coffee-flavored recipe for four eggs (5039 roll mouth cups * 14 pieces) – Low gluten flour 55g, sugar-free coffee powder 10g, oil 25g, hot water 50g, egg yolks 64g (1 egg with shell 52g-54g), caster sugar 20g, egg whites 128g (1 egg with shell 52g-54g), cornstarch 5g, caster sugar 40g. Just follow your accustomed chiffon cake method. (If using the hot dough method, please melt 20g of caster sugar first). This recipe is not too sweet or greasy, just right. Replacing the coffee powder with low gluten flour gives you the original flavor. For chocolate flavor – low gluten flour 50, cocoa powder 12. For matcha flavor – low gluten flour 55, matcha powder 8. There are tricks to making delicious dishes, and each of my dishes has a little secret. You can search for ‘cakes’ to directly view my recipes!